Thursday, May 26, 2016

WIRING

Running a seperate white ground wire
on a perimeter circuit (via Mad Dog from the forums).
Each light has wire colors not in synce with
standard colors on the harness. Changed each one
to match spec.
Will also, add a red constant hot circuit for kitchen, reading, etc. 
More later.
All wiring in spaghetti tubing and snap on holders
are what they use to hold bundles in new cars. 
Needs a 1/4" hole drilled. Available at NAPA.
Will make for Ez repairs and upgrades/ add-ons/etc.

LIGHTS

Using can over cab ambers. Like the classic
funk-o-steampunk effect.
Notice: set up a second wire/white/ground.
More later on that.
LED stop tail. Ebay. Very clean, bright. Nothing sticking
out to attack shins in darkness.

FENDERS

Inside, coat of bedliner
Outside, couple of coats of hard gloss wheel clear
Flipping the axle requires new holes for
fender mounting plates
Fender will ride about a inch higher


AXLE

Gave the spindle a good cleaning with emory cloth.
Loaded the hubs completely full of good grease.
Used double Nyloks and thread covers

MORE WHEELS

First, you gotta spin 'em
Then, a bit of steady hand. Used One Shot sign paint
thinned about 30%
Pretty fair, not Von Dutch quality

Saturday, May 14, 2016

WHEELS

Prep is a good scuff with 3M
red pad, clean with lak thinner.

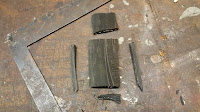
SLIPPER SPRING SNUBBERS

Maybe this will stop the noise
on the frame from the slip spring
loss end. Old tire sidewall and JB Weld.


Good surface prep, sanding, and clamping should hold
it.


COATING FRAME

Painting with bedliner material is not 
the right term. Slathering doesn't quite
match the process. let's see......
slab-slobbering....yeah that's it.
Weird stuff......use gloves. When it dries it's impervious
to every solvent.
When it's on the ground I think the big, flat exposed
surfaces should get a finish coat of a very thinned out
mix with a short knapped roller.

FINAL FRAME AND WELD

Going to use both bolts and weld.
Just a little bending was necessary to square tongue.